Cuts, Wounds, black eyes and Scars
Products used:
- Super colour palette because it blends well and doesn't dry stiff
- Black stipple sponge-corse, breaks up colour for blood application or breaking up the edges of wounds
- Colour wounds with grease paint
- Kryolan bruise and cut colour wheel
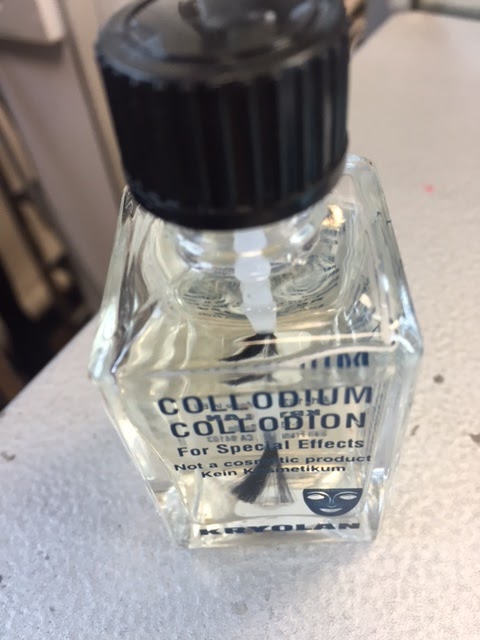
- none flexible collodium, used for old scaring and burns, gives a rough texture and can add tissue layers over the top for a more detailed burn or scar
- moulding wax-clear up yo dark colours
- latex, to be covered over the wax
- tools: metal spatular and plastic rounded spatular
- Kryolan scaring products: wound filler, light and dark colours
- blood: Kensington Gove
- fixer spray: but not on runny blood, for stay there products such as bruises
- protecting skin foam
- acetone
- Tuplast for creating realistic Edward scissor hands scars
Health and safety:
- Always test the clients skin for allergies before applying any products, such as latex
- be cautious when using products with high alcohol in, also acetone
- never double dip the products or spatular
- when drying products on the skin, use a hair dryer on the cold setting
- ensure to use a protecting from before applying any products to the skin
- Keep lids done up throughout the process
- Keep acetone away from the eyes
Fresh arm ready to be made up with special effects makeup
I applied protecting foam, and then used a spatular to smooth out a small amount of moulding wax to my clients inner arm, I then covered it in a layer of latex, to get the desired effect and to secure the moulding wax. I then used a thin hair grip to slice a cut into the wax, this made the edges of the wax turn upwards and make the look more realistic.
Using the black stipple sponge, I scrapped the skin in a dragging motion to make the skin look as if it had been scratched or grazed. I liked this effect as it looked realistic, the texture of the sponge was stiff and dragged across the skin easily leaving fine bloody lines behind it.
I used wound filler inside the moulding wax to imitate a slice in the arm, this product is a good colour and texture to create a bloody and clotted look. The wound filler is gritty and darker then the runny blood, which makes the whole thing look more realistic. When creating wounds like these it is important to know when the scar or cut has been made to make sure the colour of the blood and the skin around it is realistic.
I then build up the colour around the wound to make the overall effect believable, it is important to blend the colours as much as possible, this will build a strong colour and dismiss the white colour of the wax. I then used a pus coloured product inside the wound to give it more depth and a shiny finish, it also made the wound look infected. This is something I want to practice and use for my Dorian Gray character as his painting is described as looking infected and vile.
This product was good at making scars that look similar to the shape of those from Edward scissorhands. They sit upon the skin instead of making an indent, and look as those a bad scar has been there for a while.
This effect was created using collodium, before application it is important to apply a protecting foam to the skin as this product can cause a burning feeling. I layered on tissue to make the look more 3d and graphic, once I perfected the colouring of the scaring and burns I will be able to use this in my assessment. To remove peel off and then use spirit gum remover.
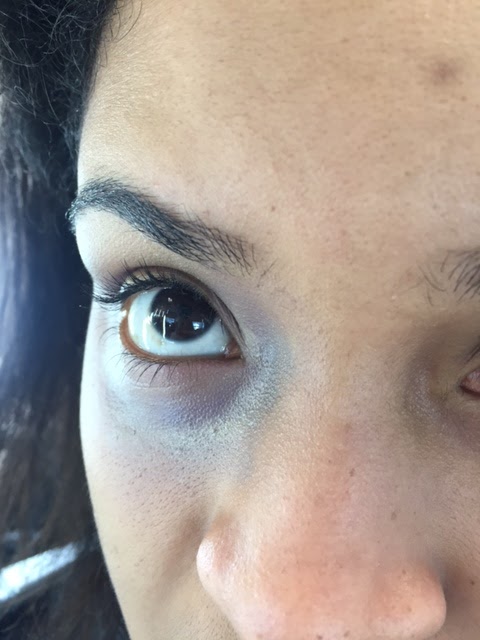
Creating a black eye was more of a challenge than I had expected, I will have to buy Kryolan bruising kit as I struggled to mix the right colours. I wanted to create a purple toned bruise, with shades of light yellow. I also want to use this technique in my final design as the effect is goof and reminds me of the painting of Dorian Gray, as it looks old and tired.
This was the bloody look my partner gave to me on my hand, I was impressed with her moulding wax application, she was able to smooth the edges and make the design look realistic. I also admire the blood running down my hand as if it was a fresh cut. Another thing I want to add to my design is eye drops to colour the eyes, red or black, this will give a sinister look.
It is important to remember, if doing the makeup for a film set to pay attention to the filming; where the person falls over and what side the grazes should be. It is also good to know the point that will graze first once fallen over, such as the knuckles, knees and elbows, as people generally protect themselves from the ground. Knowing this will help to make the effect better and realistic. Add blood to the actor when they are laying down as the blood will fall in the direction they are laying. If any product needs to be thinned out, use acetone mixed with super colour, this will create a more spreadable colour to add to the skin, but not around the eyes.


No comments:
Post a Comment